What Actually Happens When You Send a Piece to Our Carrollton Workshop
Most people who call us have a furniture question, not a furniture answer. They’ve got a dining table with a ruined finish, a dresser their grandmother left them with three loose joints and a missing veneer chip, or a set of chairs that were gorgeous in 1978 and are now the color of a cardboard box left in the rain. They want to know: can this be fixed, and how does it actually work?
This post is our answer. We’re going to walk you through every step that happens inside the shop at 2425 Parker Rd. Bldg. 5, Carrollton, TX from the moment a piece arrives through the day it goes back to its owner. No gloss, no sales pitch. Just the craft, step by step. For a visual companion to this walkthrough, you can explore our refinishing process page which includes photos from the workshop at each stage.
We’ve been running this same process in Carrollton since 1980, 45 years of refining what works and cutting what doesn’t. Whether your piece is coming to us from across the DFW metro or from right down the street, the workflow is the same. We don’t subcontract any stage of it. Stripping, structural repair, spray booth work, upholstery, it all happens under this one roof.
According to cost data from Angi’s 2026 furniture refinishing cost guide professional refinishing typically runs 30–50% less than replacing comparable solid-wood furniture, a figure that matches what we see from customers who’ve priced out both options before calling us. But cost is only part of the calculation. For pieces with real construction quality or sentimental weight, there often isn’t a replacement. That’s where a proper shop process matters.
Step 1, Intake and Assessment at the Carrollton Shop
Every job starts with a conversation. For most customers, that conversation begins before they ever load the piece into a truck, through our free online estimate where you send us photos and describe what you’re seeing. We can assess most pieces from good photos: finish condition, structural problems, veneer integrity, stain complexity. You don’t have to haul an antique armoire across town just to get a ballpark number.
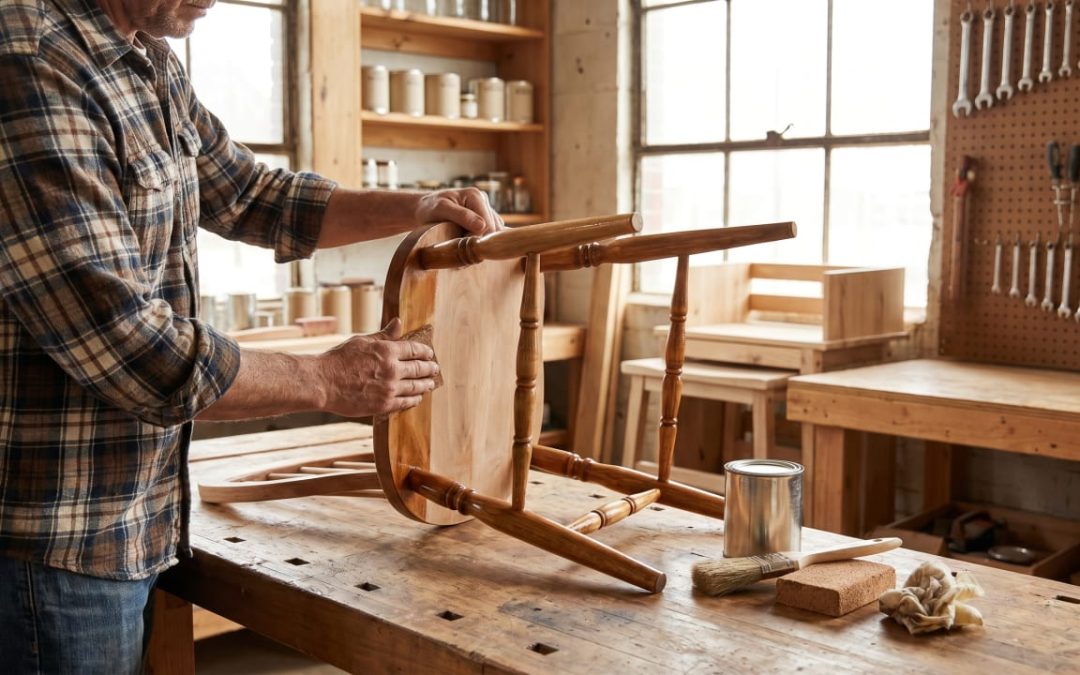
When the piece arrives at the shop, either dropped off by the customer or picked up by our crew on a metro-wide flat-fee pickup route, the first thing we do is a physical walk-through. We’re looking for things a photo doesn’t always show: how badly the joints are compromised when you push the frame, whether that white ring on the dining table is in the finish only or has penetrated the wood fibers, whether a discolored patch is a water stain or a chemical reaction that stripped the toner from the stain below.
We document what we find. If there are repairs that weren’t visible in photos, we contact the customer before proceeding, no surprise line items. We agree on the finish direction (stain color, sheen level, topcoat type), confirm the timeline, and log the piece into the queue. The piece gets a tag. Hardware, if any, gets bagged and labeled with the same job number. Nothing gets mixed up.
According to best practices documented by Mumford Restoration thorough intake documentation, including photography and condition notes before any work begins, is one of the most important steps a professional shop can take to protect both the piece and the customer relationship. We agree completely. A piece that comes in looking one way and leaves looking another should be a deliberate, agreed-upon improvement, not a surprise.
Step 2, Disassembly
Before any chemistry or abrasive touches the wood, we take the piece apart to whatever degree the job requires. For a dining chair, that might mean just removing the seat pad and any removable hardware. For a full dresser, it means pulling every drawer, removing the mirror bracket hardware, taking off the legs if they’re bolted, and bagging every screw, pull, and knob in a labeled bag that stays with the job from start to finish.
Why does this matter? Two reasons. First, chemical strippers and water-based products can cause irreversible damage to hardware finishes, brass pulls that get chemical stripper on them will pit or discolor. Second, you can’t properly strip and sand inside corners, at leg joints, or underneath overhang areas without getting the hardware out of the way first. Refinishing over hardware is a shortcut that shows up years later as finish failure along every edge.
For pieces that need upholstery work alongside refinishing, a dining chair being restained and repadded, for instance, the upholstery team pulls the seat fabric and padding at this stage too, setting it aside for the upholstery track while the frame goes through stripping. When both tracks are done, they meet again at reassembly. That’s one of the advantages of running a full-service shop under one roof: no handoffs, no scheduling gaps between a furniture shop and a separate upholstery vendor.
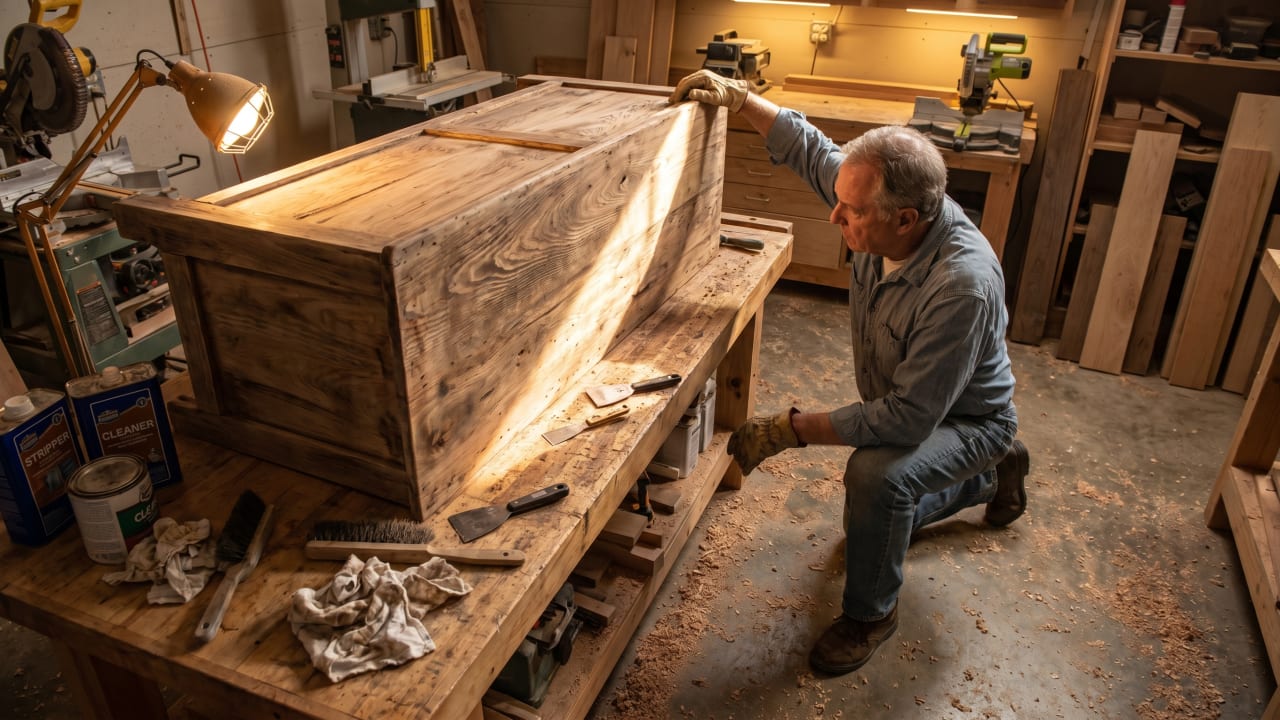
Step 3, Stripping the Old Finish
Stripping is where the piece gets honest. Once the existing finish comes off, you know exactly what you’re working with: the real color of the wood, any repairs that need to happen, any stain that went too deep or wasn’t evenly applied originally. There’s no hiding after stripping. That’s a good thing.
We use three primary stripping methods, and the choice depends on the piece:
- Chemical stripping using our overflow method, where the stripper flows over the piece as the craftsman brushes it, the chemistry stays active on the surface, and we never submerge anything in a tank. For top-only refinishes (a tabletop where we don’t want stripper running down the legs), we use a gel stripper instead. We select the stripping chemistry based on the topcoat we’re removing: lacquer responds differently than polyurethane.
- Hand-sanding without chemical strip when the existing finish is thin, in good adhesion, and the new finish will be in a similar color family, we can sand back to a clean surface without a full strip. Faster and kinder to the wood surface. The right call more often than people expect.
- Laser stripping for pieces with carved details, complex profiles, or applications where chemical access is restricted. We own a laser stripper specifically for those cases. We do not use heat guns or sandblasting on wood furniture, both are too aggressive and too imprecise, raising grain and blowing out profiles in ways that are difficult to reverse.
After stripping, the wood gets a clean-up pass with a compatible solvent and a light sanding to remove any residue and raise the grain slightly before the first repair assessment. At this point, under good shop lighting, every issue is visible: every crack, every stained fiber, every lifted veneer edge. This is the point at which the structural repair team takes over.
Step 4, Structural Repair Before Any Finish Goes On
This is the step that separates a real restoration from a paint-over-the-problem job. We have a hard rule in the shop: no finish goes on until the structure is sound. A beautifully sprayed topcoat on a chair with failing glue joints is going to look great for three months and fall apart at the worst possible moment. We’ve seen the results of skipping this step. We don’t skip it.
Structural repair in the shop covers a range of work:
- Joint re-gluing loose mortise-and-tenon or dowel joints get cleaned of old glue (critical for adhesion), refit, and clamped with fresh carpenter’s glue or an appropriate adhesive for the wood species and joint type. Clamp time is respected, a joint pulled from clamps in two hours instead of overnight is a joint that will fail again.
- Dowel replacement when a dowel has snapped inside the mortise, we drill it out and replace with a properly sized hardwood dowel. On dining chairs especially, this is one of the most common structural repairs we make.
- Dent steaming shallow dents in solid wood (not veneer) can often be raised back to the surface with a damp cloth and a clothes iron or heat gun. The steam causes the compressed wood fibers to swell back up. It doesn’t work perfectly on every dent, but when it does, the result is cleaner than filling.
- Veneer patching lifted, cracked, or missing veneer is one of the most visible repairs on older pieces. We re-glue lifted sections under contact pressure, and for missing chips we cut matching veneer from our stock and inlay it as closely as possible to the original grain direction. After staining, a good veneer patch is very difficult to detect.
- Filler work for deep scratches and gouges defects that can’t be steamed or sanded out get filled with a compatible wood filler or two-part epoxy, leveled, and sanded flush before the finish sequence begins.
Only when all of these repairs are complete, and the piece has been checked a second time under raking light to catch anything missed, does the sanding sequence begin. The repair phase and the refinishing phase are two separate loops, not one continuous flow. If new structural issues reveal themselves after an initial repair (a chair that needed one re-glue that turns out to have three more loose joints underneath), the loop runs again before any finish is applied.
For customers who need structural repair alongside refinishing, our Dallas-area furniture repair service covers everything from broken legs to full joint rebuilds, often handled in the same visit as a refinishing job, with no separate scheduling required.
Step 5, The Sanding Sequence
Sanding is not one step. It’s a sequence, and the sequence is where most surface-quality decisions get made. Rush the sanding or skip grits, and you’ll see the evidence in the final finish, scratch marks from 80-grit that show right through a clear lacquer topcoat, uneven stain absorption from inconsistent surface preparation, raised grain that a single pass of sealer didn’t flatten.
Our sequence for a full strip-and-refinish job runs:
- 80-grit initial leveling after stripping, removing any remaining finish residue and leveling filler repairs flush to the surrounding surface.
- 120-grit removes the scratch pattern left by 80, begins to reveal the wood’s natural color and figure.
- 180-grit produces a fine, consistent surface suitable for stain. Most of the stain-absorption character is set at this surface condition.
- 220-grit final prep pass, used to raise the grain slightly before the first sealer coat, then sanded back down flat once the grain fibers have stood up and been cut off.
Flat surfaces get orbital sander work; profiles, turnings, and carved details get hand-sanding. We use a detail sander for inside corners and curved profiles where a flat pad would rock and cut into the edges. The goal at the end of sanding is a surface that’s consistently smooth, consistently open, and free of any cross-grain scratches that will telegraph through the finish.
Between coats of sealer and topcoat, we sand again, typically 320-grit on sealer coats and 400-grit between topcoats. That intermediate sanding is what produces the build and smoothness of a professional spray finish versus a brush-on amateur result.
Fine Woodworking’s spray booth and finishing guide outlines the fundamentals of controlled finishing environments, the same principles that guide how our spray booth is set up to minimize dust contamination between sanding and coating stages.
Step 6, Stain Matching and Application
Color matching is part craft, part chemistry, and part patience. When a customer brings in a single chair that needs to match five others already in their dining room, the standard of success is simple: you can’t tell which one we just did. The answer, when the matching is done correctly, should make that distinction invisible.
We work with two main stain types, each with different behavior on wood:
- Pigment stains particle-based colorants that sit in the wood grain and open pores. More forgiving on uneven-absorbing woods like pine and maple; color stays consistent across the board even where absorption varies. The go-to for production work and for species that blotch badly with dye.
- Dye stains molecule-level colorants that penetrate deep into the wood fiber. Produce more translucency and figure-pop on open-grained species like oak, walnut, and mahogany. Better at matching aged finishes that have gone amber over decades. Require more control, they’re harder to lighten once they’re in the wood.
For matching work, we build sample boards from scrap of the same species before touching the actual piece. We mix, apply, and topcoat a sample until it matches the reference piece under natural light and shop lighting both. A color that looks right under fluorescent overheads and wrong in sunlight is not a correct match. Only when the sample is right do we apply to the piece.
The application itself is with a wipe-on cloth or brush depending on the open time and the piece’s geometry, always with the grain, always checking for lap marks at the transitions. Stain is wiped back on schedule, not early, not late. The timing affects the final depth and consistency of color.
Step 7, Sealer and Sanding Sealer
Once the stain has dried fully, and we let it dry completely, not just until it’s tack-free, the first protective coat goes on. This is the sealer, and its job is threefold: lock the stain in place, fill the open wood pores so the topcoat has a flat substrate to build on, and provide a surface that can be sanded back without cutting into the stain below.
The sealer coat goes on in the spray booth, then gets sanded back with 320-grit once fully cured, typically the next morning. What comes off at this sanding stage is a thin powder, not actual sealer film. The wood pores are now filled and the surface is flat. The topcoat is going onto the best possible substrate.
Step 8, Topcoat Application in the Carrollton Spray Booth
This is where the finish build happens. We apply topcoat in our enclosed spray booth, a controlled environment with proper filtration, consistent temperature, and managed airflow to prevent dust contamination and provide safe vapor management. The spray booth is the reason a professional refinishing job looks different from a brush-on finish applied in a garage. Floating particles that fall onto a wet lacquer surface create a grainy texture that no amount of wax polishing will fix; in the booth, those particles are captured before they can land.
We work with three primary topcoat systems, and the selection is based on the piece’s use, the customer’s sheen preference, and compatibility with the sealer and stain system already in place:
- Nitrocellulose lacquer the traditional professional furniture finish. Fast drying, excellent clarity, available in satin, semi-gloss, or gloss sheen. The right call for antiques, traditional styles, and pieces that may need touchups or refinishing again in 20 years, since lacquer is the most repairable of the professional topcoats. New lacquer melts into old, allowing seamless touchup without a full strip.
- Polyurethane reserved for interior commercial jobs (restaurants, hotels, offices, churches) where the durability requirements call for it. We don’t use polyurethane on residential furniture, lacquer is our standard residential topcoat across the board.
Topcoat goes on in two to three coats, with light sanding between each coat. The number of coats depends on the build we’re targeting and the sheen level chosen. Each coat is inspected under raking light before the next goes on. Runs, sags, or fish-eye contamination get addressed coat by coat, not masked at the end.

For deeper technical context on professional topcoat chemistry and application, General Finishes’ technical documentation is one of the better industry resources for understanding how spray-grade finishes cure and why temperature and humidity management during application matters. Our spray booth is climate-managed specifically to stay within the manufacturer-specified application windows for each product we use.
Step 9, Reassembly with Hardware
Once the finish is cured and rubbed out, the piece gets reassembled using the labeled hardware from intake. New hardware, if the customer has chosen to update pulls, knobs, or hinges as part of the job, gets installed at this point. We check everything: drawer slides for smooth operation, door hinges for alignment, legs for level contact with the floor, mirror brackets for proper tension.
For pieces where the existing hardware was pitted, lacquered, or showing its age, we sometimes offer to re-coat brass hardware with a clear lacquer to protect the patina and slow further oxidation, a small detail that ties the hardware’s look to the freshly finished wood without requiring new hardware purchases.
Upholstered components that were pulled at disassembly come back together with the frame at this stage. A dining chair that went through stripping, repair, staining, and topcoating on the frame, and through re-padding and fabric replacement on the seat, leaves the shop as one finished piece, not two separate deliveries that the customer has to reassemble themselves.
Step 10, Final Inspection and Delivery
Before any piece leaves the shop, it goes through a final inspection. We check the finish in natural light and under shop lighting, both, because they reveal different issues. We check structural integrity by testing every joint, every drawer, every door. We photograph the completed piece against our intake photos and verify the finish matches the agreed-upon sample board.
For customers picking up at the shop, we walk through the piece together before it goes out the door. For pieces on the delivery route, going back to any DFW address in our service area, we wrap carefully and load with padding between any contact surfaces.
We also give customers basic care guidance: what cleaning products are compatible with their specific topcoat, how long to wait before placing items on a fresh lacquer surface, and what to do if a small scratch appears down the road. A lacquer finish, in particular, is repairable without a full refinish, a small touchup can blend back into the surrounding surface in a way that polyurethane cannot. Knowing that going in changes how people use and care for their furniture for years afterward.
You can see examples of completed work from all stages of this process in our work gallery and read what past customers have said about their experience on our reviews page.
Timeline: What to Expect at the Carrollton Workshop
A straightforward refinishing job, stripping, repair, sanding, staining, sealer, and two topcoats, typically takes four to six weeks from drop-off to pickup. A complex job involving significant structural repair, veneer patching, or color matching to adjacent pieces can take longer. Large sets, a full dining room table and eight chairs, for instance, take longer still simply because of the volume of pieces moving through the booth in sequence.
We schedule jobs by intake date and give realistic estimates up front. If something in the process changes the timeline, an unexpected structural issue that adds a repair loop, a stain sample that needs three rounds to match correctly, we communicate that before it affects the delivery date, not after.
Our typical queue runs four to six weeks out depending on season, with fall (pre-holiday refresh) being our busiest intake window and late winter being the shortest lead time. If you have a deadline, a dinner party, a family holiday gathering, tell us at intake and we’ll tell you honestly whether the schedule works.
Why Carrollton Homeowners Choose This Workshop
The shop’s location on Parker Rd. in Carrollton, just off the I-35E corridor, puts us at the geographic center of the DFW metroplex. That’s not an accident. When the shop opened in 1980, founded by Andrew’s father John along what was then the northern edge of the metro, the location made sense for a workshop that needed space, good access from all directions, and proximity to the residential neighborhoods that generate most of the work.
Forty-five years later, the neighborhood has grown around us. The town itself has changed dramatically, Old Downtown now has the historic character and foot traffic that supports local businesses, and the PGBT corridor makes the shop accessible from most of the metro without a cross-town drive. Customers from the Park Cities are here in about 25 minutes; customers from Fort Worth find us the same way.
Being here for this long means we know the furniture that’s in these houses. We know the 1960s and 1970s ranch-style oak and walnut pieces that fill the older neighborhoods nearby. We know the heirloom mahogany that comes out of Park Cities estates. We know the teak and wrought iron that gets beaten up by the DFW summer every year in the northern suburbs’ backyards. The familiarity isn’t marketing language, it shows up in faster diagnosis at intake and more accurate estimates on complex jobs.
For a full overview of everything we handle in the shop, visit our services page or stop by the workshop for an in-person walk-through. The address is 2425 Parker Rd. Bldg. 5, Carrollton, TX 75010. We’re happy to show you the space and talk through your piece before any commitment is made.
Serving Carrollton and All of DFW from the Parker Rd. Workshop
Our Carrollton workshop serves homeowners and commercial clients across the entire Dallas-Fort Worth metroplex. We regularly pick up and deliver to Carrollton, Dallas, Plano, Frisco, Richardson, Allen, McKinney, Lewisville, Irving, Garland, Coppell, Addison, Highland Park, University Park, Southlake, Flower Mound, and Grapevine anywhere in DFW that has a piece worth restoring. Pickup and delivery is flat-fee based on distance; request your estimate online and we’ll confirm the pickup fee with your quote.
Frequently Asked Questions About Our Carrollton Refinishing Process
How long does furniture refinishing take at your Carrollton workshop?
Most standard refinishing jobs, a dining table, a dresser, a set of chairs, run four to six weeks from the time the piece arrives at our Carrollton shop. Complex restorations involving significant structural repair or veneer work can take longer. Large sets (a table and eight chairs, for example) take longer still due to spray booth scheduling. We give realistic timelines at intake and communicate proactively if anything in the process changes that estimate.
Do you handle the repair and the refinishing in the same Carrollton shop, or do you subcontract?
Most of our work happens in-house at our Carrollton shop. Structural repair, stripping, sanding, staining, and spray booth topcoat work are all performed by our own team in the same building. For specialty work outside our core scope, we coordinate with trusted partner vendors so the project still runs as a single integrated workflow rather than separate appointments. That matters for quality control and for scheduling, since repair and finishing run together rather than as disconnected vendor handoffs.
Can I see my piece while it’s at your Carrollton workshop?
Yes. We’re a working shop, not a black box. If you want to visit the Carrollton workshop to check on your piece, particularly if there’s a decision point like stain color or hardware selection, we can schedule a visit. We also send photos at key milestones (post-strip, stain sample approval, post-topcoat) for customers who prefer to review remotely. The stain sample approval step is one where we typically want customer sign-off before proceeding to topcoat.
What finish do you recommend for residential vs commercial pieces?
Lacquer is the traditional professional furniture finish: fast drying, excellent clarity, and repairable without a full strip, new lacquer melts into old, allowing seamless touchup. It’s our standard residential topcoat across the board, dining tables, desks, dressers, chairs, and display pieces. For commercial pieces (restaurants, hotels, offices), we step up to polyurethane, which gives better chemical and moisture resistance for high-use settings. We’ll recommend the appropriate system based on your piece and how it gets used.
How do you match a stain to my existing furniture?
We build sample boards from scrap of the same or a closely matched species, mixing stain and applying topcoat until we match the reference piece under both natural and artificial light. A match that looks right under fluorescent shop lights but wrong in daylight is not a real match. Only when the sample board reads as correct do we apply to the actual piece. For antique pieces with aged finishes that have shifted amber over decades, we factor in how the new finish will age and adjust accordingly. Customer sign-off on the stain sample is a standard part of our Carrollton workshop process.
Ready to Get Your Piece Started?
The best way to start is with a free online estimate. Send us a few photos, overall piece, any damage areas, any hardware details, and describe what you’re looking for. We’ll come back with a realistic assessment and a price range, usually within one business day. No commitment required to get the estimate.
Local homeowners can drop off directly at the shop. Customers across the metro can arrange pickup through the estimate process. Call us at 214-731-3060 or request your free online estimate to get started. If you’d like to see the workshop in person first, visit our location and contact page for directions and hours.